
Get Tech Tips
Subscribe to get free tech tips.
Some Important Terms to Know

In my recent classes with my employees at Kalos, we've been going over finding target pressures and temperatures for an air conditioning system. The goal has been to get techs to have “target” readings in mind before they start connecting tools. This step is an important part of being able to “check a system without gauges,” like we have talked about so often. Much of this list makes more sense if you are already familiar with our 5 pillars of diagnosis.
It is important that we start using these terms when speaking to one another, writing notes, and diagnosing because these will translate better across systems and across A/C and refrigeration. Some readings we take in HVAC, like static pressure and delta T, do not apply to refrigeration, while others like target condensing and evaporator temperature are key in both disciplines.
Keep in mind that when I give a “rule of thumb,” you should always consider manufacturer specs, charts, panels, install, and service manuals as superior to a rule of thumb. You will be amazed by what you might learn by reading the service and installation manuals of the systems you install and work on.
Target Evaporator Temperature or DTD (Design Temperature Difference) = The temperature of the evaporator coil should be based on the return temp (A/C 35°F below ambient) or below box temp in the case of refrigeration 10° below the box on a walk-in (20° below the box on a reach-in). On a typical A/C system with a 75°F return temperature, the DTD would be 35°F, which means the target evaporator temperature would be 40°F. The DTD will vary based on airflow and evaporator coil size.
Measured Evaporator Temperature or TD (Temperature Difference) = The suction saturation temperature (not pressure) measured on the suction gauge for that particular refrigerant. It can then be compared to box or return temperature to calculate your measured or actual TD.
Recommended reading: TD of Refrigeration Evaporators
Target Condensing Temperature Over Ambient (CTOA) = This is the target temperature of the liquid saturation (condensing temperature) measured on the gauge. It SHOULD be above the outdoor air temperature measured in the shade entering the condenser coil. This will be 30° over ambient on VERY old units, all the way down to as low as 15° on new very high-efficiency units. This is LIQUID LINE ONLY; the discharge line will be higher pressure.
Target Condensing Temperature = The outdoor temperature + the CTOA = Target condensing temperature. (Example: Outdoor Temp 95° + 15° for a 16 SEER system = 110° target condensing temp.)
Target Superheat = This is the superheat you SHOULD have, and it varies based on if the system has a TXV or piston metering device. If you have a piston, you MUST use a superheat chart and a thermo-hygrometer/psychrometer to measure the indoor wet bulb and dry bulb because those charts require those readings. If you have a TXV system, set your target at 5-15° if measured inside and 10°-20° if measured outside.
Recommended video: How to Find Target Superheat
Measured Superheat = The increase of the suction line temperature when compared to the suction saturation.
Target Subcool = The subcool you wish to achieve. Many units will have this marked on the data tag. If not, then use 10° subcool on TXV systems and 5°-15° on piston systems, recognizing that this rule will not always apply to a piston system.
Measured Subcool = The measured difference between the liquid line temperature and the condensing temperature (liquid saturation temp) off the high side gauge. This is for the liquid line only, not the discharge line.
Outdoor Ambient = The outdoor dry bulb temperature (in the shade entering near the center of the condenser coil).
Return DB = Return dry-bulb; the return air temperature without taking evaporation or humidity into account. Best taken in the return right before the unit and not in the space.
Return WB = Return wet-bulb; the temperature of the return air + the evaporative effect. Lower WB, when compared to DB, means lower relative humidity. The wet-bulb and dry-bulb will be the same at 100% RH. Best taken in the return right before the unit and not in the space.
Recommended reading: Wet-Bulb and Enthalpy – The Left Side of the Chart
Return RH% = The relative humidity of the air in the return. Relative humidity is the percentage of moisture in the air compared to how much moisture is in the air. Hotter air can hold more moisture than the same air at a lower temperature.
Target Supply Air Temperature = Target supply air temperature is calculated using a delta T chart and comparing the return DB and the return WB temperatures. The target supply air temperature is dry-bulb and can be compared to the return DB to calculate the target delta T.
Target Delta T (Air Temp Split) = Don’t confuse TD or evaporator split above with delta T or air temp split. Keep in mind that the 18°- 22° rule that many people use only applies to homes with 45% to 55% relative humidity. As RH% goes up, the target split will go down, and as RH% goes down, the split will go up. Delta T will also vary based on airflow, with higher airflow resulting in a lower Delta T.
Recommended reading: Calculating Target Delta T with Manufacturers' Data
Measured Delta T = The measured difference between the supply and return air DB. Keep in mind this should be taken a few feet before and after the unit to allow for air mixing and reduce radiant gains/losses.
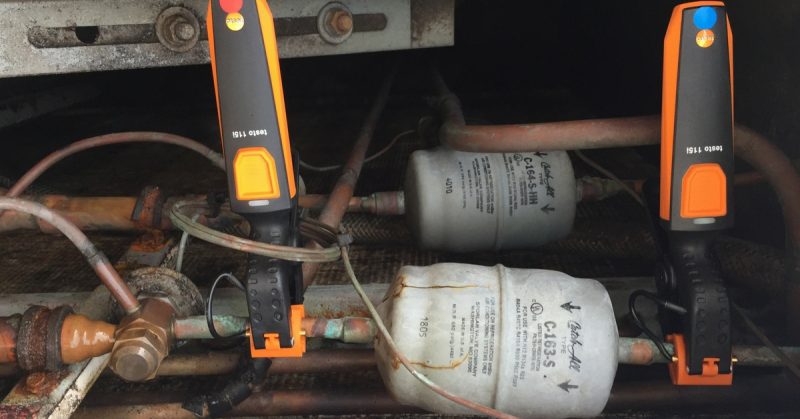
Delta H = Delta H is an advanced measurement that calculates the change in enthalpy (heat content) of the air between the return and the supply. You can do this with two digital thermos-hygrometers like the Testo 605i, and it considers the temperature and humidity of the air entering and leaving the evaporator.
Delivered Capacity = Delivered capacity is the calculation of BTUs of heat being removed from an air stream, which combines the delta H with the CFM of air to give you the total “work” being done across the evaporator coil.
Discharge Temperature = The measured temperature (with a line clamp) of the discharge line leaving the compressor, not the liquid line.
Recommended reading: Why Discharge Line Temperature is a Useful Reading
Target Liquid Line Temperature = When “checking a system without gauges,” the target liquid line temperature is the target condensing temperature minus the target subcool. This is usually measured at the condensing unit.
Target Suction Line Temperature = When “checking a system without gauges,” the target suction temp is the target evaporator temperature plus the target superheat. This is most accurate when measured inside but is also valuable when measured outside.
Approach = Approach is just another name for target liquid line temperature. It is a reading that Lennox publishes a target for on many of their units in the installation manual and on the back of the panel of the condensing unit. Systems with larger or more efficient condenser coils tend to have a lower approach (cooler liquid line), while those with smaller, less efficient coils tend to have a higher approach (warmer liquid line).
Suction Line TD (Temperature Rise) = The difference between the suction line temperature inside after the evaporator coil and outside by the condensing unit. When a suction TD is more than 10°F, compressor overheating and oil carbonization can occur under some load conditions.
Liquid Line TD (Temperature Drop) = The difference between the liquid line temperature outside by the service valve and inside before the metering device. Ideally, the liquid would have VERY LITTLE temperature drop, and any drop of more than a few degrees should be looked into. Long line length, vertical risers, running the liquid line through a low ambient space, contact between the liquid line and the suction line, or restrictions can lead to higher than normal LL TD.
Static Pressure = The positive or negative pressure exerted on all surfaces equally within a duct system. Static pressure does not measure flow; it is like the pressure inside a balloon inflating or deflating. Static pressure is generally measured in inches of water column in the USA (“WC).
Recommended reading: Static Pressure – Why Measure It?
Design TESP = This is the total external static pressure—both positive (supply) and negative (return)—that a particular furnace or air handler is designed to work under external to the appliance. Most typical residential units are designed for 0.5” WC.
Measured TESP = This is the total external static measured using a manometer or Magnehelic gauge and static pressure tips. On furnaces, this would be measured inside the furnace before and after the blower but before the coil. In an air handler or fan coil, it will generally be measured before and after the unit in the ducts. This is the total difference between the negative and positive reading, so if return static were -0.2” and supply static were +0.3”, the total would be 0.5” WC TESP.
Static Pressure Drop = This is the measured pressure change across a portion of the air system. For example, across a coil, filter, duct, etc. This helps diagnose airflow issues and changes over time.
Recommended reading: Air Filter Static Pressure Drop
While this may seem like a long list, most of it is pretty common sense. One thing to mention is the fact that if you do not have a thermos-hygrometer like the 605i and accurate temp clamps, you cannot properly check a delta T on any system or set the superheat on a fixed orifice system. To properly set a charge or diagnose a system, you need a way to accurately test line temperatures and measure return/indoor Wet Bulb, Dry Bulb, and Relative Humidity.
Step one on diagnosing a refrigerant issue, checking or setting a charge, should be to get an accurate return (or box) DB, WB, and RH as well as the outdoor ambient temperature. Then, you work from there, taking appropriate readings. When calling a senior tech or your manager, please be prepared will all relevant readings to make a quick and correct diagnosis.
—Bryan
 Related Tech Tips


Comments
I am a forman for a service place and would like to get this in a printable format so I can give it to my technicians. Is this possible?
I am a forman for a service place and would like to get this in a printable format so I can give it to my technicians. Is this possible?
cant you just print it off your computer?
cant you just print it off your computer?
Nice article. Very helpful and clear thanks for this very helpful. And very useful.
Bryan You forget to mention not to pass 65 degrees at the entrance to the compressor
Nice article. Very helpful and clear thanks for this very helpful. And very useful.
Bryan You forget to mention not to pass 65 degrees at the entrance to the compressor
Soy un técnico nuevo trabajo como handy man do fences ,deck, remplace light fixture repair some plumbing ,and fix ac heat pumps gas furnace thanks for your support ,the held me a lot .
Soy un técnico nuevo trabajo como handy man do fences ,deck, remplace light fixture repair some plumbing ,and fix ac heat pumps gas furnace thanks for your support ,the held me a lot .
Hi, my question is that the blue gauge shows the suction line temperature and pressure or the saturation temperature and pressure in the middle of the evaporator? Thanks
Hi, my question is that the blue gauge shows the suction line temperature and pressure or the saturation temperature and pressure in the middle of the evaporator? Thanks
To leave a comment, you need to log in.
Log In