
Get Tech Tips
Subscribe to get free tech tips.
How to Set a Charge by Superheat

So many techs are OBSESSED with how to set the charge rather than understanding all of the readings, specs, and system conditions that go into optimum system performance.
Before “setting the charge,” I suggest (nay, I REQUIRE) that you do a full visual inspection of the system, have an understanding of the initial factory charge and as-installed line length, and measure all of the “5 Pillars“ continuously.
Charging or “setting the charge” is all about getting the right amount of refrigerant in the system, not about adjusting the charge to try to make up for some other system or installation issue (as is commonly the case). If there is another issue, you want to fix it at the source before charging (“nip it in the bud,” as Barney Fife says).

Once you check all of those things and verify airflow (when possible/practical), then it's time to “set the charge.” Sometimes, you do that by superheat, most specifically on fixed metering device systems in the cooling mode.
First off…
Superheat is almost always a valid reading to take, but that doesn't always make it a primary charging indicator. With a TXV or EEV metering device, the superheat is controlled by the metering device itself, so you can't use superheat as the method to know when you have the proper amount of refrigerant in the system.
I know what many of you are thinking already:
I just want to know how to set the charge by superheat!!!
But trust me, that isn't ALL you want or need to know. You need to know WHEN to set the charge by superheat and what it means before I tell you HOW to do it.
Join me down this wormhole, will you?

What does Superheat Tell Us?
Superheat is heat measured in degrees of temperature. It's the degrees a vapor refrigerant GAINS above the boiling or saturation temperature (dew point in a blend). For a fluid (in this case, refrigerant) to be superheated, it must be completely changed to vapor. (HERE is a video that goes into superheat in more detail.)
The compressor is only designed to compress vapor refrigerant, so the first role of measuring superheat is to be certain that we HAVE superheated vapor going into the compressor rather than refrigerant in the saturated (part liquid) state.
The amount of superheat we have is also important. A superheat that is too low risks going to zero and causing compressor damage by flooding the compressor. A superheat that is too high means that the evaporator coil is being underfed with refrigerant, which will lead to low capacity, low efficiency, and compressor overheating on most systems.
Both high and zero superheat readings are very bad for the compressor, so we need to make sure we get it within the design range.
How to Calculate Superheat
Even though this may seem basic for some HVAC techs, we need to be clear on how to measure superheat before we can decide what it should be.
- Connect an accurate pressure gauge to the vapor (suction) side of the system, somewhere between the evaporator and the compressor.
- Convert that pressure to a saturation (boiling) temperature or the dew point temperature in the case of a blend. This conversion may be built right into digital gauges, or it may be on a separate scale on analog gauges. You may also use an app-based or paper PT conversion chart to get the “saturation temperature.” (You can read more about saturation and the pressure-temperature relationship HERE.)
- Take an accurate temperature reading at the same point (when possible), ensuring that the tubing is clean and the temperature sensor is making good contact with the line.
- Subtract the saturation (or dew point) temperature from the actual line temperature to get your superheat (temperature gained above the boiling point) at that point of the system.
In order for this process to work at all, you need:
- An accurate, calibrated pressure gauge
- An accurate, calibrated thermometer
- Good contact between the thermometer and the line
- Proper conversion from pressure to saturation temperature
There are actually three different types of superheat measurement that all serve different purposes. They all use the method listed above, but they are measured at different points.
HERE is an RSES Manufacturer Webinar that explains the relationship between saturation, superheat, and subcooling in far greater detail.
Evaporator Superheat
We measure the evaporator superheat at the outlet of the evaporator. This method of measuring superheat is most useful when setting or checking TXV or EEV operation because the job of the TXV is to set the superheat at the evaporator outlet where the bulb or sensor is located. As you can imagine, this method is especially useful in refrigeration applications, especially in rack refrigeration applications where the superheat is measured at the case. (HERE is an HVACR Learning Network course about superheat and subcooling in TXV refrigeration systems.)
Advantage – Evaporator superheat tells us how well the evaporator is being fed, which gives us more accurate insight into the evaporator, TXV, and EEV performance.
Disadvantage – Evaporator superheat does not tell us the state or temperature of the refrigerant before it enters the compressor. It also can't be measured perfectly without the presence of a suction pressure port at the evaporator outlet, which many split A/C systems do not have.
Total or Compressor Superheat
We most often measure superheat outside at the condensing unit before the compressor. This method is more useful when setting the charge via superheat because we are more carefully controlling the superheat for long compressor life. It is also the easiest point we can use to set the charge accurately.
Advantage – Compressor or total superheat tells us the state and temperature of the refrigerant entering the compressor, which helps us optimize for compressor longevity.
Disadvantage – The superheat at the coil may be different (generally lower) and may not be optimized for efficiency.
Discharge Superheat
Discharge superheat isn't used very often, but we often take it by comparing the temperature of the discharge line leaving the compressor to the suction saturation. It tells us the amount of heat gained not only in the suction line and evaporator but also through the compressor. This measurement can be useful for checking compressor performance.
When do I charge with superheat?
In air conditioning, you will be charging using superheat as the primary charging indicator when the metering device is a fixed or “piston” type.
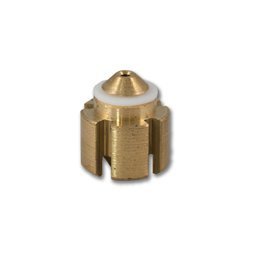
No! Not THAT kind of piston
A piston is just a little piece of brass with a hole through it that can “seat” or “unseat” depending on the direction of refrigerant flow. It is called a piston because it can slide back and forth (in most cases) in this seated vs. unseated fashion.
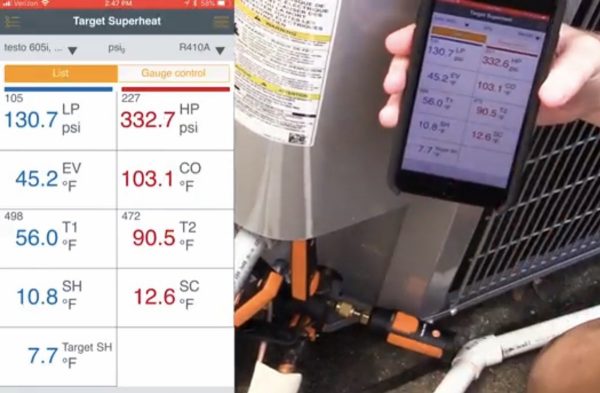
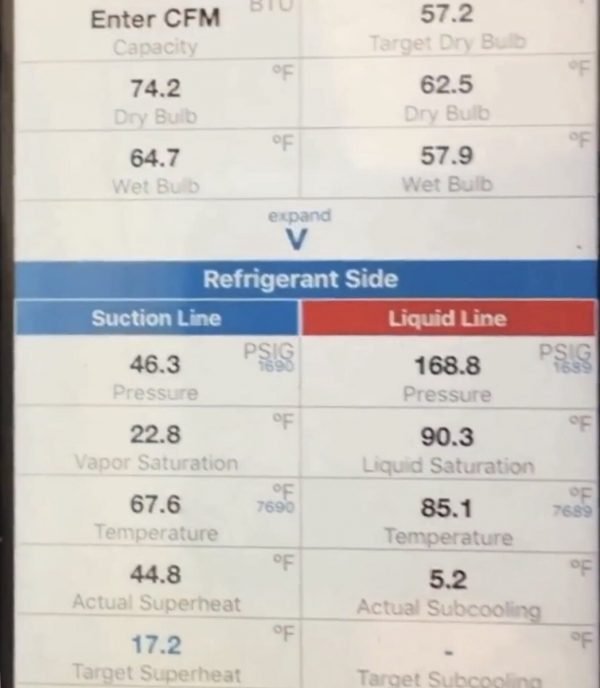
Most manufacturers will have you charge a piston system in cooling mode using a chart or calculator where you first find the TARGET SUPERHEAT. To use the chart, you will usually need:
- Outdoor dry-bulb temperature taken in the shade
- Indoor return dry-bulb and wet-bulb temperatures
You will plug these into the chart or calculator, and you will get a target superheat, generally somewhere between 5 and 25 degrees. (HERE is a video showing how to find target superheat.)
Before you begin making charge adjustments…
- Check your other readings.
- Visually inspect the system, especially the cleanliness of coils, filters, blower wheels, etc.
- Let the system run for at least 20 minutes to stabilize.
- Be aware of the total system factory charge and line length.
- Use a scale so that you know exactly how much refrigerant you are adding or recovering.
Now, all you do is compare your measured superheat to the target (after you do all the other things I told you at the beginning).
- If the target superheat is higher than your measured superheat, you recover refrigerant.
- If the target superheat is lower than your measured superheat, you add (charge with) refrigerant.
Add refrigerant slowly and carefully. Blended refrigerants need to be charged as a liquid (tank upside down in most cases), so you need to take your time and throttle the refrigerant in to make sure no liquid makes it to the compressor.
Pause for several minutes periodically as you charge or recover to ensure you don't overshoot. Be sure to monitor all of your other system readings as you go.
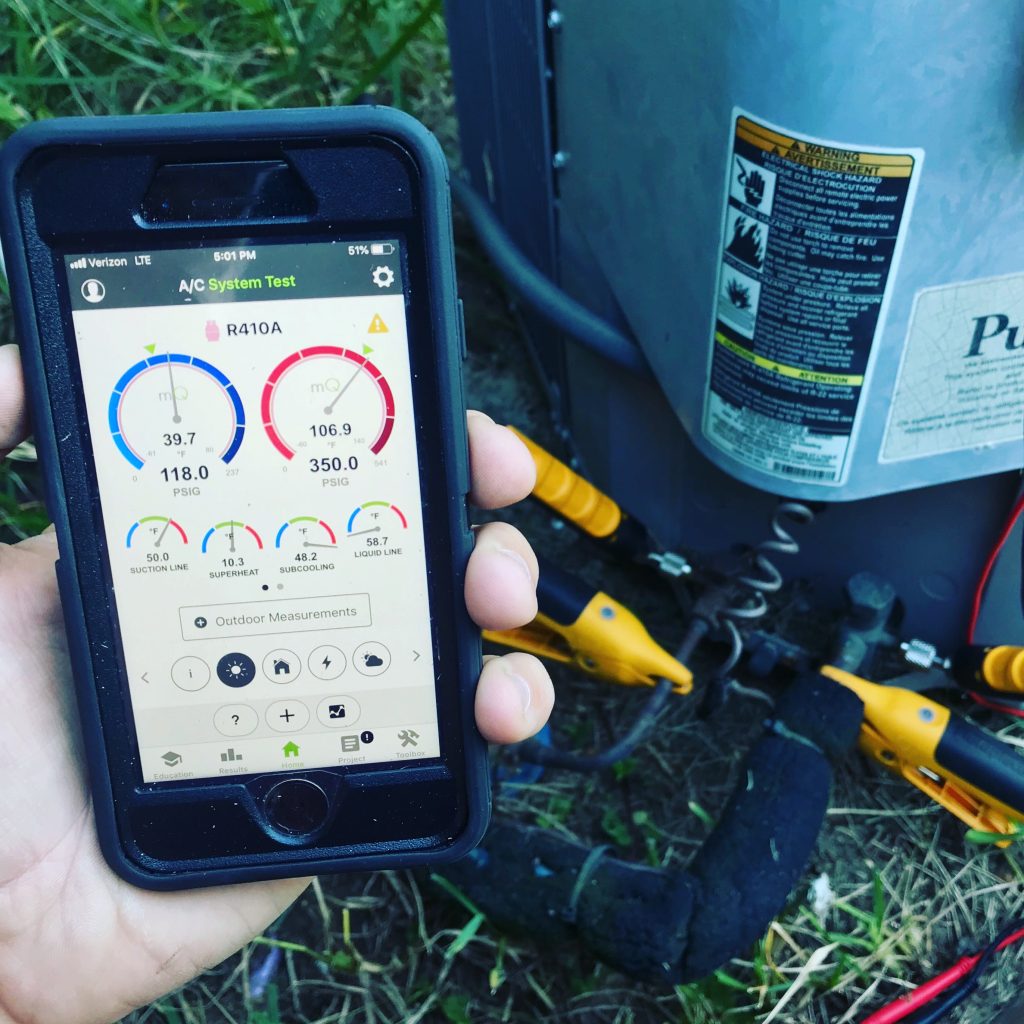
There are many apps that make this easy. You can download them on iPhone or Android, and they will help keep you from making mistakes:
- MeasureQuick (the best diagnostic app on the market)
- HVAC School App (pretty good, but I'm biased)
- Testo Smart Probes
- Fieldpiece Joblink
- Emerson Check & Charge
Here are two videos showing the whole process using Fieldpiece and Testo probes. (Bert also made a relatively new video HERE.) You'll want to watch the first one; it's really good. And while you are at it, I highly recommend subscribing to the Trutech Tools YouTube channel. (The site has some pretty sweet deals, too, especially if you use the code getschooled at checkout.
“Getting it right”
Remember, target superheat is a MOVING target. As the indoor load and outdoor temps change, the target will also change.
For you to get it right, you need to have:
- Enough run time
- Accurate tools
- A dry condenser coil
- Lots of patience
And even then, getting within 3° is about the best you can do.
—Bryan
P.S. — The ESCO Institute's HVACR Learning network has the Basic Refrigeration and Charging Procedures Training Course, which is a great course that dives into temperature and pressure, refrigeration circuit components, and more topics about basic refrigeration and charging. The course also offers a certificate of completion and NATE credits. It costs $29.95 by itself, but it's also included in ESCO's All Access Subscription Bundle, along with several other high-value courses that may also offer NATE credits.
 Related Tech Tips


Comments
To leave a comment, you need to log in.
Log In