
Low Ambient, Condenser Flooding and Headmaster Valves Podcast Companion
Today, Jeremy Smith joins us to discuss low-ambient conditions and controls, condenser flooding, and headmaster valves. He has also given us a companion article on those subjects, which you can read below.
Download the podcast directly HERE.
As always, if you have an iPhone, subscribe HERE, and if you have an Android phone, subscribe HERE.
Condenser Flooding / Motormaster Podcast Companion
This article/podcast combo is courtesy of Jeremy Smith, one of the most knowledgeable and helpful refrigeration techs I know.
It’s my feeling that, no matter how well explained, this topic really requires a treatment that is more in-depth and one that can be absorbed slowly with the ability to continually return and re-read certain sections to allow for the best understanding of the subject matter.
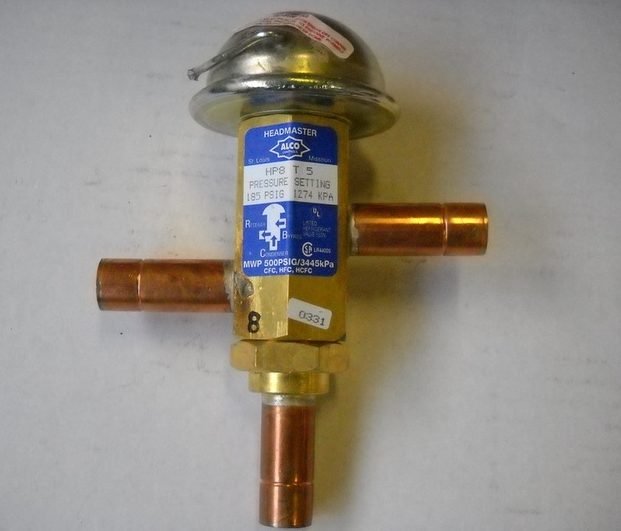
As discussed in the podcast, as the outdoor temperature drops, the capacity of the condenser increases dramatically, causing it to be essentially oversized for normal operation. To counteract that, we use a valve (headmaster) or valves (ORI/ORD) to fill the condenser with liquid to effectively reduce the amount of coil that is actively rejecting heat and condensing refrigerant. That also maintains a high enough liquid pressure feeding our TEV. This prevents wild swings in TEV control because it is a pressure-operated mechanical device.
First things first, let's open up Sporlan’s 90-30-1. Seriously, go ahead and click it; it will open in another tab, so you can go back and forth.
That document is something I reference all the time when dealing with condenser flooding problems. If you’re tech-savvy, save it on your mobile device. If you’re more of a low-tech guy, listening to a podcast and reading an internet publication on your flip phone or whatever, go ahead and print this out, laminate it, and keep it with your clipboard. Heck, even if you are a high-tech guy, sometimes nothing beats a hard copy of this the first few times you work through it.
If, after the podcast, you haven’t read through this to familiarize yourself with it, take the time to do so. It seems like a really complicated procedure to work through, and the first few times that you do it on your own, it can be. With practice, however, you’ll get used to it.
We'll work through a condenser flooding calculation here in slow time, outlining all the different calculations taken into account.
First, let's lay out the basic info we need. The measurements and counts will vary, of course, depending on the equipment that you have.
If we have an R-22 unit, 44 condenser passes ⅜” in diameter each are 38 ¾” long with 42 return bends. Our evaporator temperature is 20°F, current temp is 35°F, and the lowest expected ambient is -20°F.
Now, that seems like a lot of information, but we'll break it all down.
First, we need to figure the total length of the condenser tubing in feet. So, we take 44 x 38 ¾” and get 1705” of tubing. 1705 ÷ 12” per foot gives us 142.083 feet of tubing. Now, that's just the straight tubing. We've got return bends to account for.
Refer to our Sporlan document. In TABLE 1, you'll find an equivalent foot length per return bend. In the case of a ⅜” return bend, it's 0.2 feet per bend, so 42 x 0.2 gives us 8.4 feet more.
Add those together for a total length of 150.483. Go back to TABLE 1 and look in the R-22 section under ⅜” tubing; follow the line for -20°F across. You'll find a density factor of 0.055. This number is how many pounds of liquid refrigerant are needed to fill one foot of tubing at that temperature. So, 150.483 x 0.055. That equation gives us 8.28 pounds; this is the amount required to fill the entire condenser with liquid, but we don't really need to fill the WHOLE coil…
Go back to the document, TABLE 2 this time.
Across the top, find 20° evaporating temp. Now, follow that down to the -20°F row; this gives us a percentage. That percentage is 82%, so this unit at -20% will have 82% of its condenser filled with liquid. So, let's take 8.28 x 0.82 to get our flooding charge.
6.78 pounds.
Now, what does this number really mean? That number is the amount of refrigerant we need to add to a system that we've JUST cleared the sight glass on when the ambient temperature is 70°F or higher. If our ambient temperature were 70 degrees or warmer, we could add just that amount past a clear sight glass and walk away, satisfied in knowing that the unit will run properly no matter what the weather throws at it.
Remember, though, that our current ambient is 35°F. So, now what?
Time to stop. Get your Sharpie out and WRITE THAT NUMBER DOWN! Record it on the unit somewhere easy to see but in a place where the sun won’t degrade the ink over time. That way, you only have to go through this one time. If you’re doing a new installation and startup, do the next guy a favor and write both this AND the total system charge down somewhere so that they don’t have to guesstimate the charge when it all leaks out.
Now, let's go back to TABLE 2 and look at the 35°F row. We find that at 35°, we need to have 63% flooded. Well, we've got a clear sight glass, and it's 35° ambient, so we're already 63% flooded.
Since the most we need is 82% flooded, 82%-63% gives 19%, so we take our total (8.28 x 0.19) to get 1.57 pounds. At our current conditions, that's all the flooding charge that we need to add because we've already got some flooding going on to have a clear sight glass because we’re under the 70-degree mark and the low-ambient controls are in play and doing their job.
Some techs claim that just spraying water on the coil will flood the condenser enough to allow the use of that as a charging technique. Let's think about it for a minute. What variables come into play with a method like that? Variables that we can't control… for starters, what is the wet-bulb temperature of the air entering the condenser? How well is the condenser wetted? With the stakes being what they are, I'm not excited about the prospect of using this because I'm probably going to be the guy who winds up on the roof when it's -20, the wind is howling, and this unit is low on gas because someone tried to use this method to figure a flooding charge, didn't get enough gas in the unit, and now it's short. I've still got to my due diligence as a service tech, do a full leak check, not find anything, and walk away wondering if I missed a leak somewhere all because someone else didn't take a couple of minutes to do a little work to do the job properly. This is a totally preventable service call.
What about TABLE 3, you ask? Very astute, and that tells me that you’re reading ahead. Excellent. I have never had to use it.
It gives a different flooding percentage for units with an unloader and low ambient controls where they’ll be running in low ambient conditions. With the unloader, remember that we’re really moving less heat, changing the condenser dynamic, and making it even MORE oversized than it would be if there weren’t an unloader, so more refrigerant needs to be added to properly flood the condenser.
—Jeremy Smith
P.S. – You can check out the Testo 770-3 multimeter we mentioned in the middle by going here.


Comments
I’ve listened to this episode around 20 times not joking! like you say we have lot’s window time. I had never seen a head master valve until today. I got so excited about it because now I could play around with one on a system that was not properly operating. I went through the directions on both articles and guess what? It was like magic!!! Thanks for this and for all the other episodes that have also given me much insight.
I’ve listened to this episode around 20 times not joking! like you say we have lot’s window time. I had never seen a head master valve until today. I got so excited about it because now I could play around with one on a system that was not properly operating. I went through the directions on both articles and guess what? It was like magic!!! Thanks for this and for all the other episodes that have also given me much insight.
That’s pretty cool Ian. It’s great to hear the content helped you. Jeremy Smith is a smart dude.
That’s pretty cool Ian. It’s great to hear the content helped you. Jeremy Smith is a smart dude.
To leave a comment, you need to log in.
Log In