
Get Tech Tips
Subscribe to get free tech tips.
Combustion Testing Doesn’t Stop in the Summer

This tech tip was written by Casey Contreras. Casey is a field coach and instructor for the National Comfort Institute (NCI). Thanks, Casey!
As HVAC technicians, our careers often focus on either cooling or heating. Because of this split view, we typically ignore gas-fired appliances during the cooling season.
There are dangers lurking in any gas-supplied home, and if you don’t know what to look for or ignore the signs because it’s 100°F outside, you could create liability for yourself, the company you work for, and your customers.
Let’s talk about visual indicators and testing practices you can do so you can leave a job with confidence that nothing will go wrong.
The Lack of Information
Prior to combustion testing, my training, or the lack of it, emphasized that signs of rust or white powder indicated a corrosive chemical in or around the combustion appliance zone (CAZ). This is something I frequently encountered in my service area.
HVAC equipment is often located in garages, outside closets, and interior closets. I found rust and white powder everywhere. To deal with this situation, I told my customers to stop using or storing any type of chemicals near their equipment.
Several years later, I learned what really caused the corrosive problem. What an “aha!” moment it was. That knowledge helped me realize the potential dangers and liability I could have.
Rust or White Powder Might Be Your Problem
Jim Davis with NCI (National Comfort Institute) taught me in his combustion class that rust and white powder are typically not caused by chemicals. Instead, they’re created by condensation and flue gas spillage.
When you find a rusty water heater or furnace, you may think it isn’t your job to take care of it. However, the responsibility can still be yours. Sounds crazy, right? Consider this: there are laws that protect the consumer and put the responsibility on you.
You’ve heard the phrase, you touch it; you own it. This other phrase also applies: if you see something, say something. That means being diligent to protect yourself and your customers.
Visual Clues
Here are signs you should pay attention to. They may end up saving you, your company, and customers.
Flue gas spillage happens more than you think. When flue gases spill, they condense. That condensation is not just water; it also contains carbonic acid that attacks metal surfaces and eventually leads to rusting.
White powder is also caused by carbonic acid. This dried-up residue often doesn’t affect anything unless it builds up in the flue or pressure switch port and causes nuisance trips.
Both rust and white powder are signs of flue gas spillage.
You often find such evidence on natural draft equipment. Typically, the problem has nothing to do with the equipment itself. Flue gas spillage is often caused by building pressure and the installed flue. In other words, natural draft equipment is more susceptible to changes in building pressure.
Natural draft equipment should have 40 to 50% dilution air entering the draft hood and mixing with the flue gasses. That dilution air percentage often comes down to how leaky the building is and the type of pressure changes that occur.
Sometimes natural draft equipment won’t have rust or white powder. Other visual indicators of flue gas spillage are melted waterline grommets, wiring, and discoloration around the burner compartment.
What’s the Cause?
Building pressure and improper dilution air often create spillage out of the equipment as it runs. This spillage is in the form of carbon monoxide (CO). CO levels can rise and spill out of the burner box and any opening built into that flue.
When flue gas hits the ambient air, it cools down and eventually condenses. Rust and white powder may be the result.
You can have different variations of this. Sometimes, you’ll find a unit with white powder and melted grommets or just rust. Or some equipment will have all three symptoms at the same time.
If you find and solve the issue in a timely manner, no harm, no foul. However, when ignored, bad things could happen, and the liability may come back on you.
Test It to Prove It
I can’t stress this enough: Test, Test, and Test more. If you step back and look at everything you work on from refrigerant, electricity, and air, they are mostly invisible. Remember, without testing, you can’t determine what is happening with any aspect of the HVAC system.
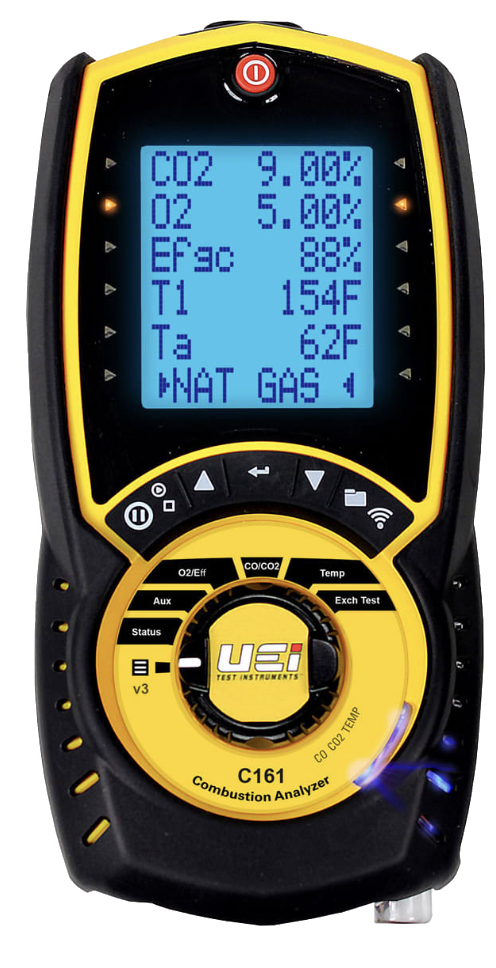
The test is what I call the combustion TDR (test, diagnosis, and repair). To accomplish this, you need a combustion analyzer that continuously measures carbon monoxide (CO), oxygen (O2), and flue temperature. Most modern analyzers will have these features and much more.
The industry standard for conducting a combustion analysis is to operate the equipment for 10 minutes and take a single CO measurement, sometimes O2, to determine if the equipment is operating safely.
Unfortunately, just doing a single test by itself won’t help you discover the issues that create rust, white powder, or melted grommets.
Testing Examples
According to NCI Combustion Testing Protocols, gas-fired equipment should have stable operation with readings of less than 100 ppm of CO and stable oxygen readings between 6–9% in a flue gas sample. Remember the stable part. It’s important and often overlooked.
Example: Industry-recommended test practices after 10 minutes of operation.

In this example, the system seems to work perfectly with one set of readings. Let’s test the same equipment but now take multiple readings during the 10-minute period and see if you notice anything.

If we follow the NCI approach, you’ll notice how a set of readings can show actions and levels of carbon monoxide and oxygen. The first example shows that the criteria have been met and assumes stable operation. However, the same unit with more measurements shows rising CO and falling oxygen, which means the equipment is spilling flue gases into the space. This is one of the most overlooked problems in our industry.
A Different Process
To test for spillage, you must install test ports in the flue before any dilution air and before draft hoods on natural draft equipment. For induced 80% AFUE furnaces (which do not have dilution air), the test port should be a minimum of 12 inches above the inducer outlet.
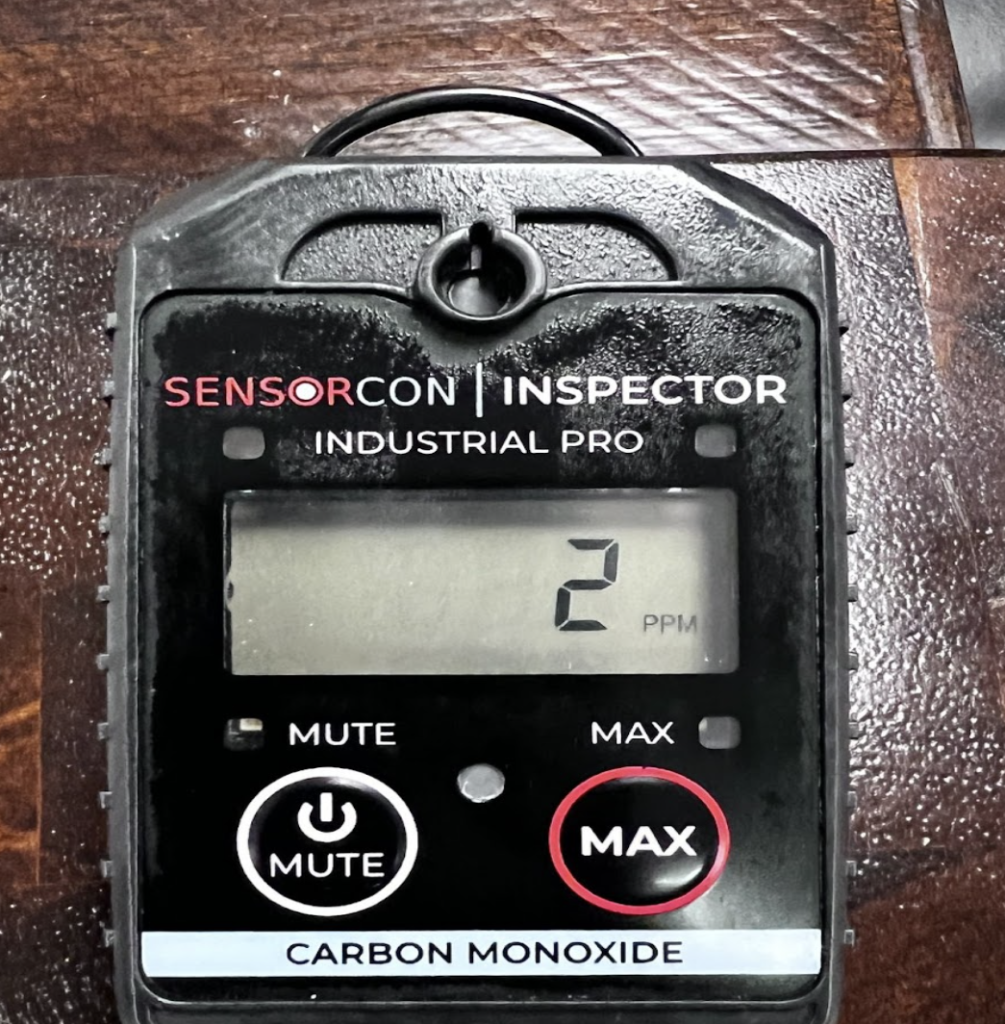
Measure ambient CO with a personal CO monitor as you test. Get your tools set up first before operating the equipment. Then, start the equipment up and allow it to operate for at least one minute before taking measurements. It will need to stabilize after the light-off cycle.
Measure and document multiple CO (As Measured) and oxygen readings for a minimum of five minutes. Some equipment may have slower response times, which will require longer test times.
Levels and actions of CO and O2 tell a story. The story can be about proper air-to-fuel mixture or dangerous operation. The cause of rust is flue gases not having a chance to fully exit to the outdoors. You would see this on your analyzer as rising CO and falling O2, just like in the second example.
Oxygen falls because it is being displaced by flue gas spillage. This action results in flue gases now attempting to become the combustion air for the equipment, resulting in a rise in CO. What makes this situation so scary is that you don’t know when the rising CO readings will stop. They may take a large jump in a dangerous direction when conditions change.
Disable and Red Tag
Depending on your location, there’s little information regarding who has the authority to disable and red tag equipment. I get comments in class about how the city inspectors, fire departments, or utilities say technicians have no authority to do so, with vague codes or local laws backing up their claims.
According to the National Fuel Gas Code (Section A.3.2.2), in many circumstances, the property owner or his delegated agent assumes the role of the authority having jurisdiction.
Your company is the only organization that frequently visits the customer. As their delegated agent, it is your responsibility to exercise care (combustion analysis) to discover safety issues, take action to prevent harm (disable and red tag), and then warn the occupants of impending danger.
There is a great article from 2009 written by John Hall titled “Red Tagging a Furnace: Who is Responsible?” I highly recommend this read. It explains disabling unsafe equipment, red tag responsibilities, and how contractors around the country handle it.
The Importance of Low-Level CO Monitors
Conditions can change after you leave a job site, so it’s best to recommend low-level CO monitors for your customers. These devices are not the same thing as a store-bought CO alarm, which will tolerate much higher levels of CO than a low-level CO monitor before alarming. Unfortunately, homeowners end up with a false sense of security when the protection they’ve purchased is minimal.
There are low-level CO monitors available for purchase from various organizations. These devices will alarm before your customers are in danger and can call you for help.
The best place to monitor CO is on every call you go to. You never know what’s in the air you breathe, so make sure it doesn’t contain CO. Once you’ve mastered this, start looking for the visual signs and testing for them. You’ll be surprised at what you find once you start looking.
—Casey Contreras
 Related Tech Tips


Comments
To leave a comment, you need to log in.
Log In