
Get Tech Tips
Subscribe to get free tech tips.
Checking Disconnects

Disconnects walk the fine line of being HVAC or electrical, but the HVAC technician is allowed to repair and replace disconnects in most places. Even if you work at a place where it isn't allowed, finding problems is a diagnostic skill you will want to have, and checking disconnects is a good thing to do on each job.
As always, work safely with proper safety gear and on de-energized equipment whenever possible.
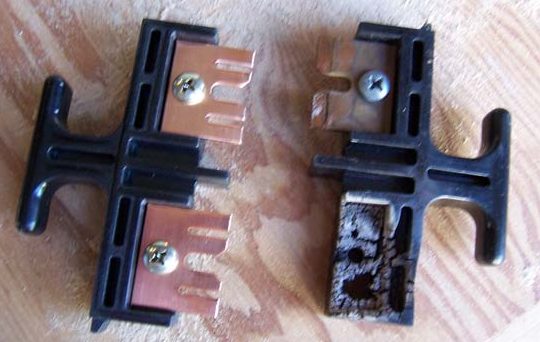
Check Pull Condition
On a pull-out disconnect, the pull should fit tightly with little to no carbon buildup or signs of arcing. In some cases, you can replace the pull alone, but most of the time, you will need to replace the entire disconnect if it is damaged.
Check for Proper Connections
Poor connection and improper wire sizing are the two biggest causes of disconnect damage. Confirm the wire matches the MCA (minimum circuit ampacity) of the connected unit. Then, check the connection lugs for a snug fit while unenergized. It's best to follow the torque recommendations and use a torque screwdriver when possible.
When in Doubt, Check for Voltage Drop
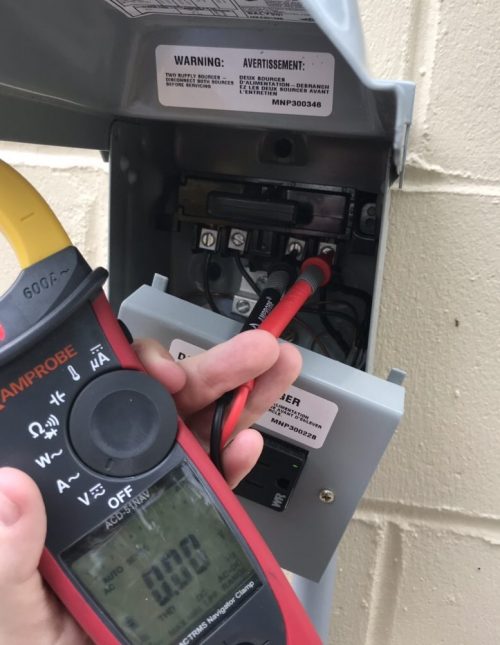
Whenever you suspect an issue with a disconnect, you can simply check for a voltage drop across the line and load sides of the disconnect on each leg. You should read little to no voltage between line and load, as shown above. If you have a thermal imaging camera or an infrared thermometer, you can also check for hot spots on the disconnect lugs.
Seal Behind Disconnects with Rear Penetrations
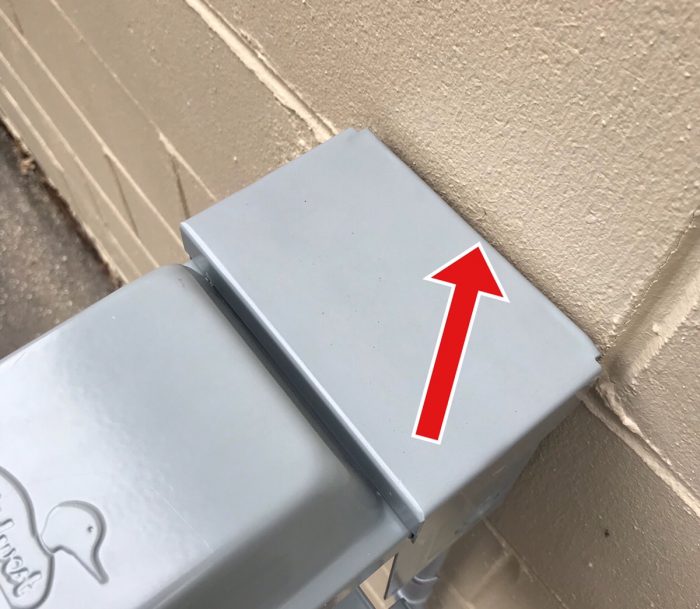
In many cases, a disconnect will be fed with the wire coming from the wall behind it. In these cases, it can be difficult to properly seal the wall and the penetration into the disconnect. This is why we should seal the top of the disconnect to the wall to prevent rainwater from running down behind and into the wall or disconnect.
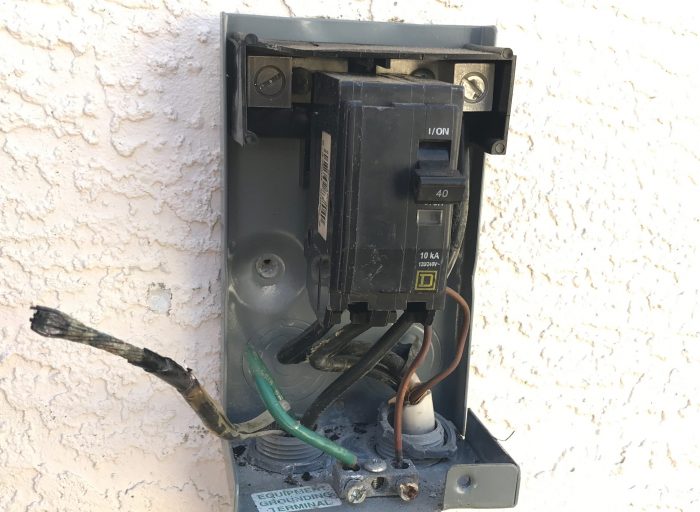
It is a good practice to replace any damaged connectors and make sure there are no signs of moisture intrusion or corrosion in the disconnect. Inspect the whip for proper fittings and strapping at the same time. Look at the ground connections in the disconnect and where they connect to the system; make sure they are properly connected under a dedicated grounding screw.
There have been many breakdowns and even fires over the years caused by issues with disconnects. Make inspecting them a regular part of your maintenance and service call process, and you can save some issues.
—Bryan
 Related Tech Tips


Comments
To leave a comment, you need to log in.
Log In